Ever wonder what those website boxes that make you fill out your information are called? Ever wonder how they worked or are designed? These are what’s known as forms. Forms are found on almost every website, with the simplest case being a ‘Contact Us’ form; usually a page where you enter a subject line, email and a short message. This is just the tip of the iceberg when it comes to forms, as forms are used for all sorts of cases: feedback, registration, payments, orders, the possibilities are extensive! So that’s why today we’re going to cover forms on ClubHosting!
Creating a form for your website is very easy with ClubHosting.org. For example, if you would like to have a membership form that allows people to fill it out online, so you no longer have to encounter penmanship or other issues, and have them print it out and either mail you payment or pay for it directly on your website through PayPal you can do that easily with ClubHosting; all you have to do is create a new form.
Creating/Editing a Form
To do so, we’ll first go to our Dashboard and navigate to Forms. In the Forms section we can click create a new form or edit on an existing form, in this case, the Join our Club form. The form fields that can be added to a form are listed on the right hand side of the screen (Standard Fields, Advanced, Post, etc). Simple forms generally tend to only use Standard form fields; while more elaborate or detailed forms, especially for payment collection, use the Advanced/Post/Pricing form fields; but forms are very customizable so there’s not a strict structure to how to populate a form with these field types.
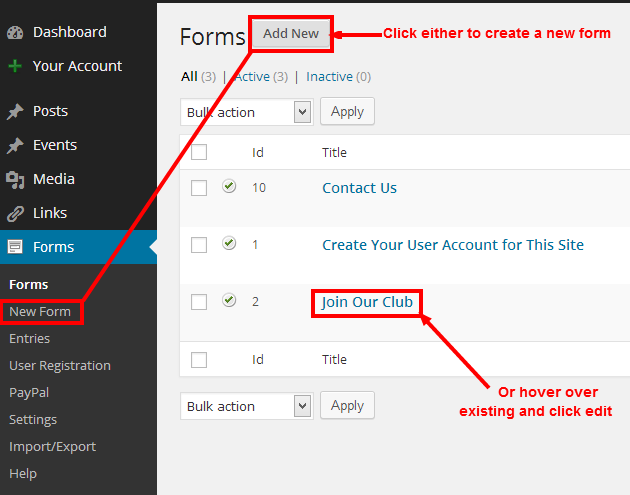
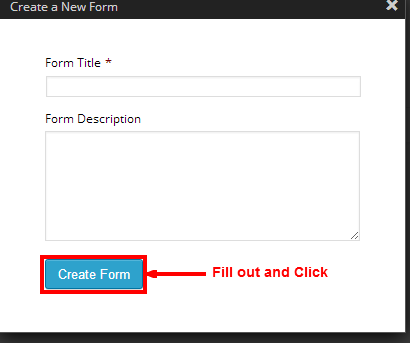
Follow the following on-screen instructions:
To add a form field onto the form, you simply navigate to the form field and click on it. On the left-hand side of the screen you’ll notice a form field box appear with the selection you chose. Inside the form field box you can edit the name of the field by editing the Field Label. Each form field will have its own set of properties and advanced options for deeper functionalities (such as conditional logic).
If you would like to gather custom information on a form, the easiest and most general way to do so is by adding the ‘Single Line Text’ field. Here you can rename the Field Label to any type of information you want to gather from the user, i.e. Sled Registration Number.
When you’re done editing the form, all you have to do is click Save/Update. From here you can preview the form by clicking the preview button in the form links.
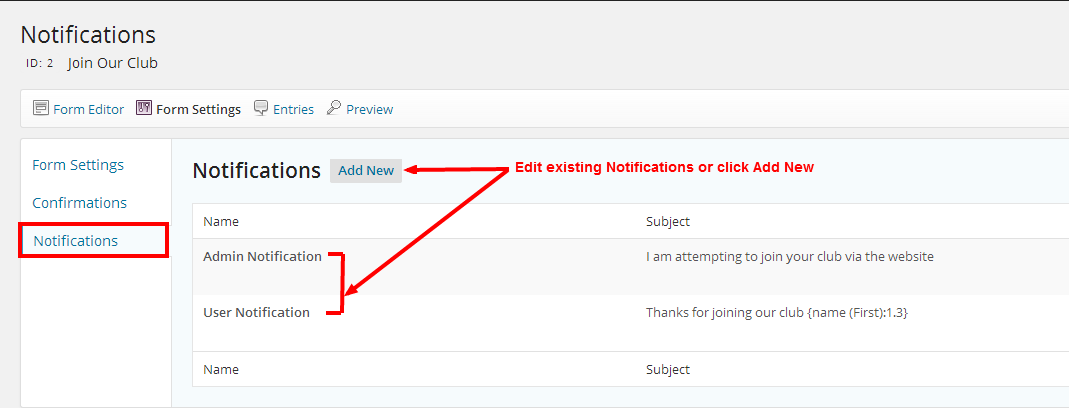
Next we’ll have set up the Form’s settings. In the Form Settings there are basic form settings, as well as confirmations and notifications. Confirmation/Notification settings are important for defining:
- What users will see after they register/click submit on the form
- How the form notification email looks and what it contains coming from the website to the admin
- How the form notification email looks and what it contains coming from the website to the user.
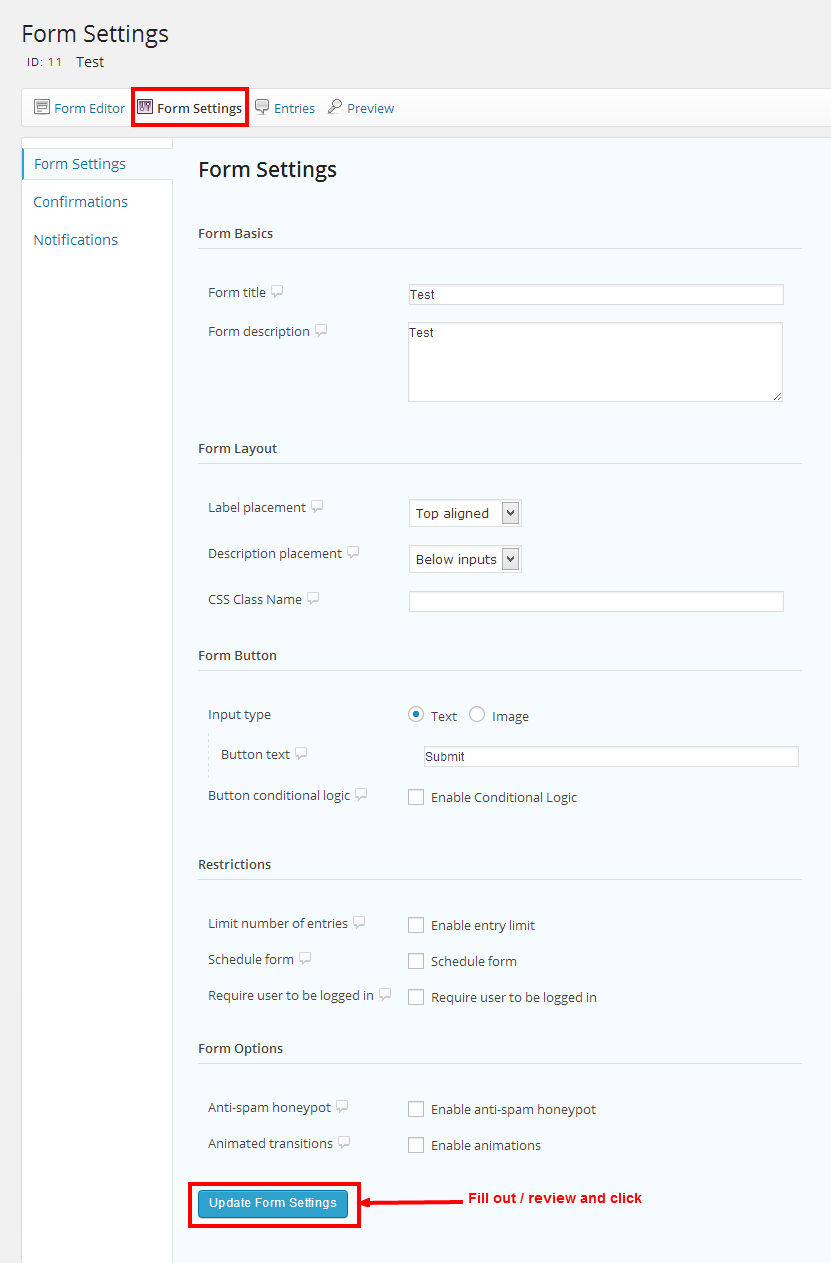

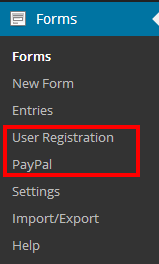
If you intend on collecting payment on your website through PayPal there are settings in the Dashboard under Forms (PayPal Settings) in which have directions on how to configure PayPal on a selected form. Similar instructions can be followed for User Registration on the website. We also have more in-depth form creation coverage found in our other support sections.
Now go and give it a whirl and see how truly easy it is to create forms with ClubHosting!
